SWEET AND SOUR SAUCE

This delicious sauce is the perfect accompaniment for any occasion.
It is very easy to make and the flavor is unique and delicious, you will find different brands on the market that offer this type of sauce, but do it at home is much better.
It is widely used in Asian food dishes, where the acid and the sweet flavor come together to form the perfect marriage.
This sauce is a favorite in my family and we have enjoyed in countless meals.
Ideal with snacks at parties.
If you want your kids to eat even more vegetables, replacing the traditional with the sweet and sour sauce, they will love the taste.
I hope you try and enjoy this sauce is delicious on everything you want.

INGREDIENTS

  • 1 can of pineapple chunks 15 oz
  • 2 cups of ketchup
  • 1/2 cup of pineapple juice
  • 3 tablespoons of apple cider vinegar
  • 3 tablespoons of agave nectar

DIRECTIONS

In a saucepan over low heat place all ingredients, stir well, cover the pot and simmer for 5 minutes.

Cool completely and store in an airtight container in refrigerator up to one week.

This recipe makes 4 cups of sweet and sour sauce.

Preparation time: 10 minutes
Cooking time: 5 minutes
Level of the recipe: Easy

Versión en español CLICK AQUI

Esta deliciosa salsa es el acompañamiento perfecto para cualquier fritura, ideal en mariscos ya que el sabor contrasta muy bien.
Es muy fácil de hacer y su sabor es incomparable y delicioso, encontrara en el mercado diferentes marcas que ofrecen este tipo de salsa, pero hacerla en casa es mucho mejor.
Es muy usada en platillos de comida asiatica, donde el asido y el dulce se unen para formar el matrimonio perfecto.
Esta salsa es una de las preferidas en mi familia y la hemos disfrutado en una cantidad innumerable de comidas.
Ideal para acompañar los bocadillos en las fiestas.
Si desea que sus hijos coman aun mas vegetales, sustituya lo tradicional con la salsa agridulce, les encantara el sabor.
Espero la pruebe y disfrute, ya que es deliciosa en todo lo que desee acompañar.

INGREDIENTES

  • 1 lata de pina en trozos de 15 onzas
  • 2 tazas de Ketchup
  • 1/2 taza del jugo de la pina en trozos
  • 3 cucharadas de vinagre de manzana
  • 3 cucharadas de Agave nectar.

PREPARACION

En una olla a fuego bajo coloque todos los ingredientes, revuelva bien, tape la olla y deje hervir por 5 minutos.

Deje enfriar completamente y guarde en un contenedor hermético en el refrigerador hasta por una semana.

De esta receta salen 4 tazas de salsa agridulce.

Tiempo de preparación: 10 minutos
Tiempo de cocción: 5 minutos
Nivel de la receta: Facil

ENGLISH VERSION CLICK HERE

LOW FAT STRAWBERRY ICE CREAM

If you like strawberry ice cream you will love this version.
Low in fat and sugar delicious for those hot afternoons, and you can enjoy with your family.
It is also an option for people who are lactose intolerant.
I am looking for healthier options with lots of flavor, that allow me to enjoy with my family on summer afternoons.
With this same recipe you can create different flavors, using seasonal fruits.
Simple to make and you don’t need of an ice cream maker for this recipe, a 4 ingredients ice cream sounds good to me.
This is a different way to enjoy ice cream, something delicious without feeling guilty when you eat, the best is completely homemade and 100% made with fresh fruit.
Enjoy it.

INGREDIENTS

  • 3 cups strawberries, washed and cut in half
  • 1/4 cup of sugar
  • 3 tablespoons of water
  • 1 can of nonfat evaporated milk of 14.5 oz

DIRECTIONS

The night before freeze the can of evaporated milk and remove from freezer 1 hour before starting the preparation.
In a small saucepan over medium heat place the strawberries, sugar and water, let it cook for five minutes, remove from heat and allow to cool completely.

Place evaporated milk in the mixer and whisk until doubled in volume, add cold strawberries and stir to incorporate well.

Place in a plastic container and freeze for 3 hours.
 
When ready, serve ice cream with fresh fruit and fat-free strawberry syrup.

This recipe makes 12 ice cream cones or 6 cups of ice cream.

Preparation time: 20 minutes
Cooking time: 5 minutes
Level of the recipe: Easy

Versión en español CLICK AQUI

Si te gustan los helados de fresa esta version le encantara.
Bajo en grasa y azúcar delicioso para esas tardes calientes y puede disfrutar tranquilamente junto a su familia.
También es una opción para las personas que no toleran la lactosa.
Busco opciones mas saludables con mucho sabor, que me permitan disfrutar junto a mi familia las tardes de verano.
Con esta misma receta usted puede crear diferentes sabores, utilizando las frutas de temporada.
Esta es una forma diferente de disfrutar los helados, algo delicioso sin sentirse culpable cuando lo coma, lo mejor es completamente hecho en casa y 100% hecho de frutas frescas.
Que lo disfrute.

INGREDIENTES

  • 3 tazas de fresas lavadas, y cortadas por la mitad
  • 1/4 taza de azúcar
  • 3 cucharadas de agua
  • 1 lata de leche evaporada sin grasa de 14.5 onz

PREPARACION

Congele la lata de leche evaporada desde el dia anterior y saque del congelador 1 hora antes de iniciar la preparación.
En una olla pequeña a fuego medio coloque las fresas, agua y azúcar, deje que se cocinen por cinco minutos, retire del fuego y espere a que enfríen completamente.

Coloque la leche evaporada en la batidora y bata hasta que duplique el volumen, agregue las fresas frias y revuelva para que se incorporen bien.

Coloque en un recipiente de plastico y congele por 3 horas.

Cuando este listo disfrute acompañando el helado de frutas frescas y sirope de fresa sin grasa ni azúcar.

De esta recetas salen 12 conos de helados o 6 copas de helados.

Tiempo de preparación: 20 minutos
Tiempo de cocción: 5 minutos
Nivel de la receta: Facil

ENGLISH VERSION CLICK HERE

SIMPLE WHITE RICE

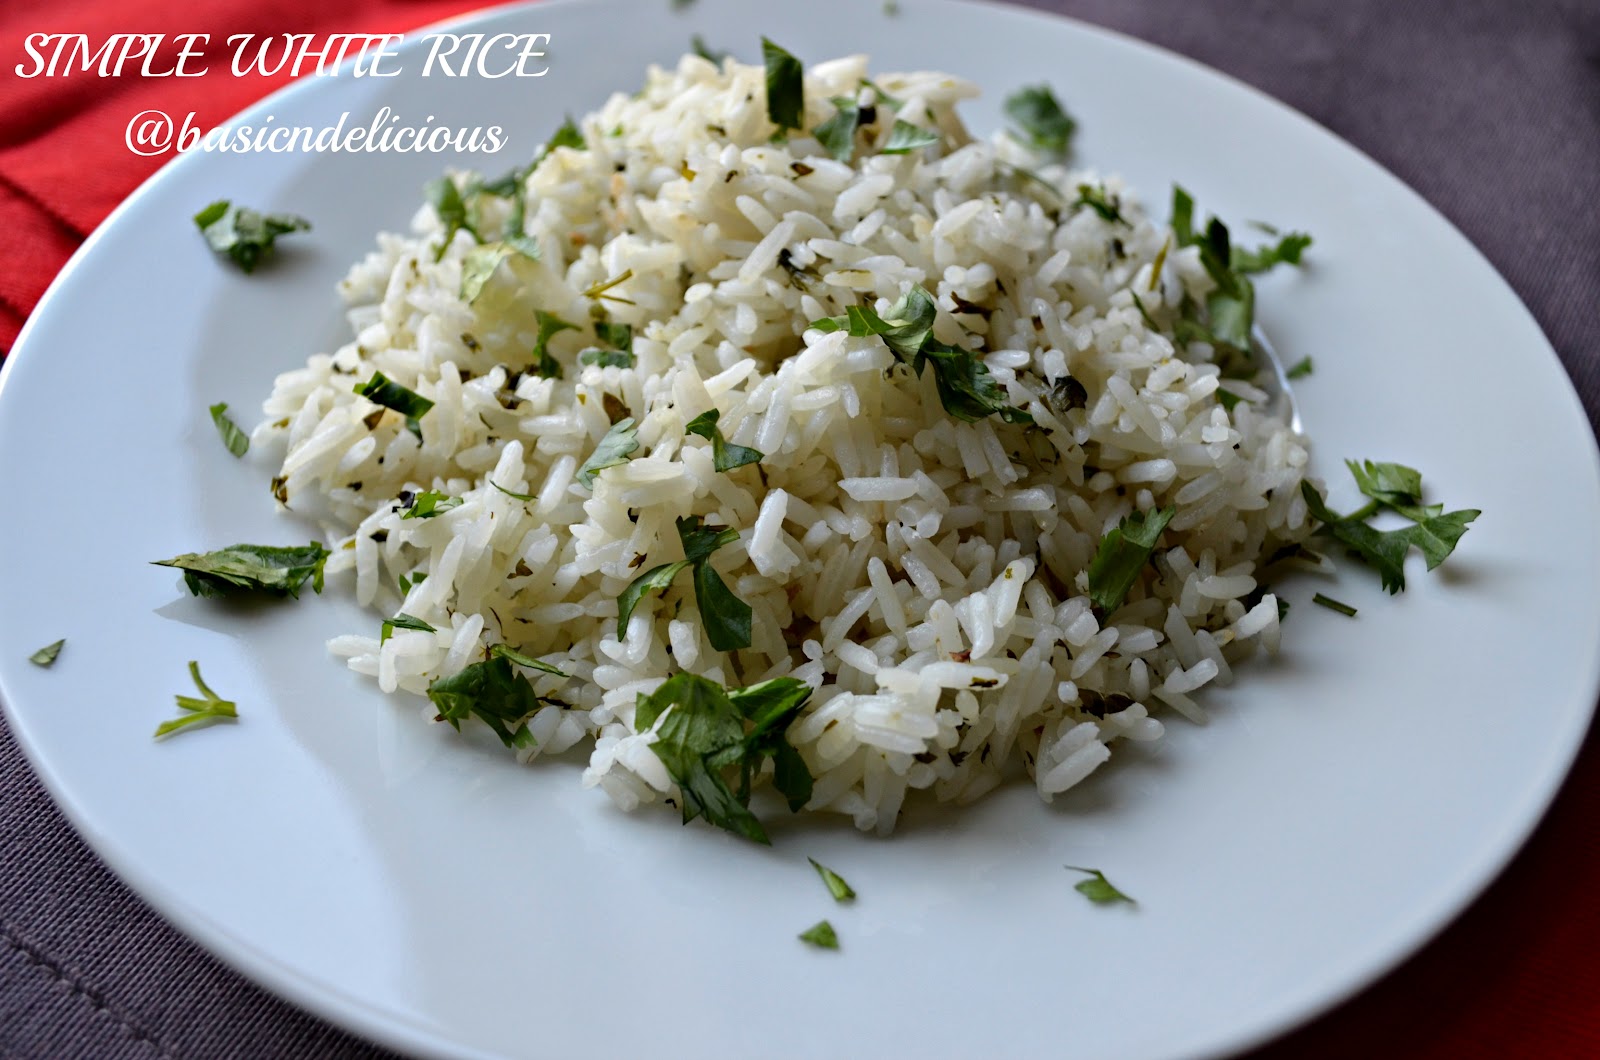
This is the basic recipe of how to prepare a delicious white rice.
It’s amazing how many people prefer to buy the rice cooked and do not realize how easy and delicious it is to make it at home.
No need for magic tools, all you need are some simple steps to make the white rice always comes out perfect.
This rice is the foundation for a lot of recipes you can make a full meal, simple, delicious and healthy.
I invite you to try this recipe and you’ll never buy cooked rice.

INGREDIENTS

  • 2 cups of uncooked long grain rice
  • 1 teaspoon of oil
  • 1 tablespoon minced garlic
  • 2 teaspoons of salt
  • 1/2 cup chopped fresh cilantro
  • 2 1/2 cup of warm water

DIRECTIONS

In a saucepan heat oil over medium heat add the garlic and rice, stir for 5 minutes, this process is called toast the rice, add salt and cilantro stir well.
Add hot water, stir the rice when you incorporate the water.

Cover and reduce heat, simmer for 20 minutes, do not lift the lid of the pot when the rice is cooking. Having completed the 20 minutes, lift the lid and stir with a fork.

Cover the pan, turn off the heat and let rice sit for 10 minutes.

Before serving, stir the rice with a fork again.

Serves 6 people.

Preparation time: 10 minutes
Cooking time: 30 minutes
Level of the recipe: Easy

Versión en español CLICK AQUI

Esta es la receta basica de como preparar un delicioso arroz blanco.
Es increíble como mucha gente prefiere comprar el arroz ya echo y no se da cuenta lo fácil y delicioso que es prepararlo en casa.
No necesita de herramientas mágicas, lo único que necesita son unos pasos muy simples pero delicados para que el arroz blanco siempre le salga perfecto.
Este es el arroz base para una gran cantidad de recetas que usted misma puede elaborar, una comida completa, simple, delicioso y saludable.
Lo invito a que pruebe esta receta y nunca volvera a comprar arroz en ninguna parte.

INGREDIENTES

  • 2 tazas de arroz de grano largo crudo
  • 1 cucharadita de aceite
  • 1 cucharada de ajo picado
  • 2 cucharaditas de sal
  • 1/2 taza de cilantro picado
  • 2 1/2 taza de agua caliente

PREPARACION

En una olla caliente a fuego medio el aceite agregue el ajo y el arroz, revuelva por 5 minutos, a este proceso se le llama tostar el arroz, agregue la sal y el cilantro, revuelva bien.
Agregue el agua caliente, revuelva el arroz mientras incorpora el agua.

Tape la olla y baje el fuego, deje cocinar por 20 minutos, no levante la tapa de la olla cuando el arroz se este cocinando.
Cuando ya hallan pasado los 20 minutos, levante la tapa y revuelva con un tenedor.

Tape la olla, apague el fuego y deje que el arroz repose por 10 minutos.

Una vez pasado el tiempo mueva un poco el arroz con un tenedor y sirva.

Rinde para 6 personas.

Tiempo de preparación: 10 minutos
Tiempo de cocción: 30 minutos
Nivel de la receta: Facil

ENGLISH VERSION CLICK HERE

BRAIDED BREAD STUFFED WITH PINEAPPLE JELLY

Among the great variety of bread that exists, I personally love this braided bread for my family, which can be filled with a lot of things, herbs, cream cheese, dulce de leche, jellies, etc.
It’s delicious and essential in the table at breakfast time.
I usually whenever I visit a girlfriend took some pastry with me, because my grandmother taught me that it’s rude to arrive empty-handed, so this type of bread is perfect for such an occasion.
Enjoy this bread re very easy to do and change your mornings with a little something homemade and full of flavor.
Enjoy it.

INGREDIENTS

  • 3/4 cup pineapple jam
  • 1 tube of bread dough ready, brand of 13.2 OZ PILLSBURY
  • 1 egg
  • 1 teaspoon of water
  • 2 tablespoons of flour

DIRECTIONS

Preheat the oven at 350 degrees F (175 degrees C).

Sprinkle the work table with flour and stretch the dough into a rectangle.
In the center of the dough measures 3 in and mark on each side.
Cut 9 strips diagonally to the 2 sides of the dough using a pizza cutter.
Place the pineapple jam in the center and spread the jam carefully.

Start building the braid by placing a strip of dough above the other alternately.

Beat egg with water and brush the braid put on a tray lined with parchment paper and bake for 25 minutes.

This recipe makes one braid bread.

Preparation time: 20 minutes
Cooking time: 25 minutes
Level of the recipe: Easy

Versión en español CLICK AQUI

De los panes que mas gustan en mi familia esta el pan trenzado el cual se puede rellenar de una gran cantidad de cosas, hiervas, queso crema, dulce de leche, jaleas, etc.
Es delicioso y esencial en la mesa a la hora del desayuno.
Yo en lo personal acostumbro cada vez que visito a alguna amiga llevo repostería casera porque mi abuela me enseño que es de mala educación llegar con las manos vacías, así que este tipo de panes es perfecto para una ocasión como esa.
Disfrute de este pan relleno, muy facil de hacer y cambie un poco sus mananas con algo casero y lleno de mucho sabor.
Que lo disfrute.

INGREDIENTES

  • 3/4 taza de jalea de pina
  • 1 tubo de masa preparada para pan marca PILLSBURY de 13.2 OZ
  • 1 huevo
  • 1 cucharadita de agua
  • 2 cucharadas de harina

PREPARACION

Precaliente el horno a 350 grados F ( 175 grados C )

Rocie la mesa de trabajo con harina y estire la masa para formar un rectángulo.
En el centro de la masa mida 8 cm y haga una ralla a cada lado.
Corte 9 tiras diagonalmente a los 2 lados de la masa utilizando un cortador para pizza.
Coloque la jalea de pina en el centro y extienda con cuidado.

Empiece a formar la trenza colocando las tiras de masa una encima de la otra alternadamente.

Bata el huevo con el agua y pinte la trenza, coloque en una bandeja forrada con papel encerado y hornee por 25 minutos.

Esta receta hace una trenza de pan.

Tiempo de preparación: 20 minutos
Tiempo de cocción: 25 minutos
Nivel de la receta: Facil

ENGLISH VERSION CLICK HERE

HAM AND CHEESE MUFFINS

These delicious muffins with ham and cheese will simplify the work in the morning because they are easy and quick to make.
It’s a full breakfast in one bite.
These muffins are the favorites of my family and also are ideal for a picnic.
I invite you to try these delicious muffins that are full of flavor.
Enjoy it.

INGREDIENTS

  • 6 ounces of low fat cooked ham
  • 2 cups of flour
  • 3/4 cup of grated Parmesan
  • 1/4 cup of chopped cilantro
  • 2 tablespoons of baking powder
  • 1/2 teaspoon of salt
  • 1 egg
  • 1 cup of nonfat milk
  • 1/4 cup of sour cream

DIRECTIONS

Preheat the oven at 400 degrees F (200 degrees C).

Place the flour, baking powder and salt in a bowl, add the ham, cheese and cilantro.
Separately incorporated sour cream, egg, milk and add to mixture above.
Stir until everything is well incorporated.

Place the mixture in portions in a muffin pan previously greased.

Bake 18 minutes, let cool in the pan for 15 minutes and move to a wire rack to cool completely.

Store in an airtight container.

This recipe makes 12 muffins.

Preparation time: 10 minutes
Cooking time: 18 minutes
Level of the recipe: Easy

Versión en español CLICK AQUI

Estos deliciosos muffins de jamon y queso le simplificaran el trabajo en la mañana.
Son faciles y rápidos de hacer y no le quitaran mucho tiempo.
Es un desayuno completo en un solo bocado que dejara a pequenos y grandes pidiendo mas.
Son los favoritos de mi familia y los fines de semana se acaban muy rápido, también son ideales para llevar a un día de campo.
Los invito a probar estos deliciosos muffins, que están llenos de delicioso sabor.
Que lo disfruten.

INGREDIENTES

  • 6 onzas de jamón cocido bajo en grasa
  • 2 tazas de harina
  • 3/4 taza de queso parmesano
  • 1/4 taza de cilantro picado
  • 2 cucharadas de polvo de hornear
  • 1/2 cucharadita de sal
  • 1 huevo
  • 1 taza de leche sin grasa
  • 1/4 taza de natilla o crema agria

PREPARACION

Precaliente el horno a 400 grados F ( 200 grados C ).

Coloque la harina, polvo de hornear y sal en un tazón, agregue el jamón, queso y cilantro.
Por aparte incorpore la crema agria, el huevo a la leche y agregue a la mezcla anterior.
Revuelva hasta que todo este bien incorporado.

Coloque porciones de la mezcla en un molde para muffins previamente engrasado.

Hornee por 18 minutos, deje enfriar en el molde por 15 minutos y pase a una rejilla a que enfríen completamente.

Almacene en un contenedor hermético.

De esta receta salen 12 muffins.

Tiempo de preparación: 10 minutos
Tiempo de cocción: 18 minutos
Nivel de la receta: Facil

ENGLISH VERSION CLICK HERE

BASIC SPONGE CAKE

This sponge cake is  very versatile, used for making different desserts.
It can be filled with different creams and sauces, and is ideal for Trifles.
It is very easy to make and its consistency is delicious to accompany breakfast or coffee in the afternoon.
You can prepare it in the morning and enjoy a quick dessert for dinner.

INGREDIENTS

  • 6 eggs 
  • 1 cup of sugar 
  • 1 1/2 cup of flour 
  • 1 teaspoon vanilla extract 
  • 1 teaspoon of lemon zest

DIRECTIONS

Preheat the oven at 350 degrees F (180 degrees C).

In a mixer whip the eggs and sugar until they double in volume, add the vanilla and lemon zest.
Sift the flour and add gradually fold into the batter.

Lightly grease a springform pan and line the base with wax paper, do not grease the sides.
Pour the mixture and bake for 35 minutes.

Let cool in the pan for 15 minutes, then remove the sides of the pan and finish cooling on a wire rack.

Preparation time: 20 minutes
Cooking time: 35 minutes
Level of the recipe: Easy

Versión en español CLICK AQUI

Este es un queque esponjoso, muy versátil que sirve para hacer diferentes postres.
Se puede rellenar con diferentes cremas o salsas, y es ideal para hacer Trifles.
Es muy fácil de hacer y su consistencia es deliciosa para acompañar el desayuno o cafe de la tarde.
Puede prepararlo en la mañana y disfrutar un rapido postre a la hora de la cena.

INGREDIENTES

  • 6 huevos
  • 1 taza de azúcar
  • 1 1/2 taza de harina
  • 1 cucharadita de extracto de vainilla
  • 1 cucharadita de ralladura de limon

PREPARACION

Precaliente el horno a 350 grados F ( 180 grados C ).

Bata los huevos con el azúcar hasta que dupliquen su volumen, agregue la vainilla y la ralladura de limon.
Cernir la harina y agregue poco a poco con movimiento envolventes.

Engrase un molde redondo y forre la base con papel encerado, no engrase los lados.
Vierta la mezcla y hornee por 35 minutos.

Deje enfriar en el molde por 15 minutos, desmolde el bizcochuelo y coloque en una rejilla para que termine de enfriar.

Tiempo de preparación: 20 minutos
Tiempo de cocción: 35 minutos
Nivel de la receta: Facil

ENGLISH VERSION CLICK HERE

CRUNCHY BEEF TACOS

Tacos are a delicious and different option for families to enjoy any day of the week.
You can make them with beef, chicken, seafood and vegetables as well, always good to have variety. This recipe is an inspiration in my oldest daughter who discovered the tacos for the first time 2 weeks ago.
She had never tested and as expected she loved, it’s amazing how children suddenly ask you things to eat with great emotion.
Well, we have included these tacos as part of the family favorites, and I do not complicate much, I make them crunchy, we can get this product ready in supermarkets and is personally my favorite, lettuce and grated cheese and meat super delicious and is all you need, Crunchy Beef Tacos for dinner.
The best thing is that it only takes 30 minutes to prepare and everyone can add what they like, is truly a family time that everyone should enjoy.
I hope you like.

INGREDIENTS

  • 1 pound of ground beef 
  • 1 medium onion, chopped 
  • 1 tomato, chopped 
  • 1 garlic clove minced 
  • 1 tablespoon Worcestershire sauce 
  • Juice of 1 lemon 
  • 1/2 teaspoon of dried oregano 
  • Salt and pepper to taste 
  • Cooking spray 
  • 10 Crunchy Taco Shell 
  • shredded lettuce 
  • Shredded Mexican cheese

DIRECTIONS

Heat a skillet and spray with cooking spray, add onion, oregano and garlic, cook for 3 minutes, add meat and cook until golden brown and juices are evaporated, about 20 minutes.
Add the tomatoes, Worcestershire sauce, salt and pepper and cook for 7 more minutes, finally add the lemon juice and serve.

Place all the components on plates in the middle of the table for everyone to make their own Taco.
This recipe makes 10 tacos.

Preparation time: 10 minutes
Cooking time: 30 minutes
Level of the recipe: Easy

Versión en español CLICK AQUI

Los tacos son una opción deliciosa y diferente para disfrutar en familia cualquier día de la semana.
Puede hacerlos de lo que mas le guste, carne, pollo, mariscos y porque no vegetarianos también, siempre es bueno tener variedad.
Esta receta es una inspiración en mi hija mayor que descubrió los tacos por primera vez hace 2 semanas.
Nunca los había probado y  como es de esperar le encantaron, es increíble como los ninos de repente te piden cosas de comer con mucha emoción.
Bueno se han incluido como parte de los favoritos de la familia, pero no crean que me complico mucho, los hago crunchy porque esta tortilla la podemos comprar ya lista en el supermercados y es en lo personal mi favorita, lechuga y queso rallado y la carne arreglada super deliciosa y listo, Tacos de Carne Crunchy para la cena.
Lo mejor es que solo toma 30 minutos prepararlos y cada uno puede agregarle lo que mas le guste, es de verdad un momento en familia que todos deben disfrutar.
Espero que les gusten.

INGREDIENTES

  • 1/2 kilo de carne molida especial
  • 1 cebolla mediana picada
  • 1 tomate picado
  • 1 diente de ajo picado fino
  • 1 cucharada de salsa Worcestershire
  • El jugo de 1 limon
  • 1/2 cucharadita de oregano seco
  • Sal y pimienta al gusto
  • Spray de cocina
  • 10 tortillas crunchy para Tacos
  • Lechuga rallada
  • Queso rallado tipo Mexicano

PREPARACION

Caliente una zarten y rocie con spray de cocina, anada la cebolla, el oregano y ajo, cocine por 3 minutos, agregue la carne y cocine hasta que dore bien y los jugos se hallan evaporado completamente, aproximadamente 20 minutos.
Agregue el tomate, salsa Worcestershire, sal y pimienta y cocine por 7 minutos mas, por ultimo rocie el jugo de limon y sirva.

Coloque todos los componentes en platos en el centro de la mesa para que cada uno haga su propio Taco.
De esta receta salen 10 Tacos.

Tiempo de preparación: 15 minutos
Tiempo de cocción: 30 minutos
Nivel de la receta: Facil

ENGLISH VERSION CLICK HERE

FRIED RICE

This is a great option to use the rice that was made before, and one of the quickest ways to prepare lunch or dinner that will delight the whole family.
These days we look for recipes with few ingredients that facilitate the day and not have to spend hours cooking, and a delicious flavor that will surprise you. Not forgetting that is low in fat.
The fried rice is delicious and you can vary the ingredients the way you like most, you can even make it completely vegetarian, if that’s the case.
Make this recipe for your family and surprise them with a new way of eating rice and maybe will become the favorite.
Enjoy it.

INGREDIENTS

  • 4 cups cooked white rice 
  • 1 red onion, finely chopped 
  • 1 red bell pepper, finely chopped 
  • 1 cup of chopped cilantro 
  • 200 grams of chopped cooked ham 
  • 4 tablespoons soy sauce, low sodium 
  • 2 tablespoons Worcestershire sauce 
  • Cooking spray 
  • salt and pepper to taste

DIRECTIONS

In a hot skillet spray with cooking spray and add the onion and red bell pepper, cook for 5 minutes, add the ham and stir.
Add rice and mix well, add the soy sauce and Worcestershire sauce, stir well until everything is completely incorporated, add salt and pepper.

Remove from heat and sprinkle the cilantro, serve with salad.
Makes 6 servings.

Preparation time: 10 minutes
Cooking time: 10 minutes
Level of the recipe: Easy


Versión en español CLICK AQUI

 Esta es una excelente opción para utilizar arroz del día anterior, y una de las formas mas rápidas de preparar un almuerzo o cena que encantara a toda la familia.

Y en estos días buscamos recetas de pocos ingredientes que nos faciliten el dia y no tengamos que pasar horas cocinando, lo mas importante es su sabor delicioso le sorprenderá.
El arroz frito es delicioso y puede variar los ingredientes de la forma que mas le guste, hasta puede hacerlo completamente vegetariano, si ese es el caso.
Haga esta receta para su familia y vera como les encantara, una nueva forma de consumir el arroz y puede ser que se convierta en la favorita.
Que la disfrute.
INGREDIENTES

  • 4 tazas de arroz blanco cocinado del dia anterior
  • 1 cebolla morada picada finamente
  • 1 chile dulce rojo picado fino
  • 1 taza de culantro picado
  • 200 gramos de jamón cocido picado
  • 4 cucharadas de salsa de soya baja en sodio
  • 2 cucharadas de salsa worcestershire
  • spray de cocina
  • sal y pimienta al gusto
PREPARACION
En una saten caliente rocie con spray de cocina y agregue la cebolla y el chile dulce rojo, deje cocinar por 5 minutos, agregue el jamon y revuelva.
Agregue el arroz y mezcle bien, incorpore la salsa de soya y la salsa worcestershire, revuelva bien hasta que todo este completamente incorporado, agregue sal y pimienta.
Retire del fuego y rocie el cilantro, sirva acompañado de ensalada.
Rinde 6 porciones.

Tiempo de preparación: 10 minutos
Tiempo de cocción: 10 minutos
Nivel de la receta: Facil


ENGLISH VERSION CLICK HERE

MASHED POTATOES FOR BREAKFAST?

How you describe a breakfast like this? Maybe a little insane, but if you think about it many times we need a change in the daily breakfast.
Do not mistake me this dish is also excellent at lunch or dinner. Ham and potatoes in a single bite, what better combination than this, well maybe bacon.
It is truly an inexplicable feeling in your mouth, delicate pieces of ham wrapped in a delicious and delicate flavor with a puree out of this world.
It is a delicious side dish or main course.
And let me tell you this mash will turn into one of your favorites instantly.
Enjoy it.

INGREDIENTS

  • 2 pounds of Yukon Gold Potatoes cut and pell into chunks
  • 8 onz. of fat free sour cream
  • 1/2 cup of fat free Half and Half at room temperature
  • 6 slices of ham
  • Salt and Pepper to taste

DIRECTIONS

Cook potatoes in a pot with salted water about 30 minutes. Once ready the potatoes, pass through a colander and place back into the pot and set aside.

Cook ham slices until browned and cut into small pieces.

Mash potatoes with a fork or potato pestle, add the milk, sour cream, salt and pepper and ham, stir well until everything is completely incorporated.

For the mashed potatoes to stay warm, place the mashed potatoes in a bowl over a water bath or serve immediately.
Makes portions.

Preparation time: 30 minutes
Cooking time: 40 minutes
Level of the recipe: Easy

Versión en español CLICK AQUI

Como se describe un desayuno como este? un poquito demente talvez, pero si lo piensan bien muchas veces necesitas un cambio en el desayuno diario.
No me mal interpreten este platillo tambien es excelente a la hora del almuerzo o la cena.
Jamón y papas en uno solo, que mejor combinación que esta, bueno quizás tocino no creen.
Es de verdad una sensación inexplicable en su boca, delicados trocitos de jamón envueltos en un suculento y delicado pure con un sabor de otro mundo.
Es un delicioso acompañamiento o plato fuerte, al final no importa de que manera lo consuma lo mas importante es que lo disfrute.
Y les digo que este puré es el pecado mas grande que uno pueda cometer y del que nunca se arrepentirá.
Que lo disfruten.

INGREDIENTES

  • 1 kilo de papas peladas y cortadas en trozos
  • 8 onzas de natilla o crema agria sin grasa
  • 1/2 taza de leche sin grasa a temperatura ambiente
  • 6 lonjas de jamón
  • Sal y Pimienta al gusto 

PREPARACION

Cocine las papas en una olla con suficiente agua con sal aproximadamente 30 minutos.
Una vez listas las papas, pase por un colador y coloque de nuevo en la olla y aparte.

Cocine las lonjas de jamón hasta que doren y corte en trozos pequenos.

Maje las papas con un tenedor o un maja papas, agregue la leche, natilla o crema agria, sal y pimienta y el jamón, revuelva bien hasta que todo este completamente incorporado.

Para que el pure se mantenga tibio, coloque un tazón sobre un bano maria o sirva inmediatamente.
Rinde 8 porciones.

Tiempo de preparación: 30 minutos
Tiempo de cocción: 40 minutos
Nivel de la receta: Facil

ENGLISH VERSION CLICK HERE

BABY POTATOES WITH BUTTER

I begin this week with recipes dedicated to the Potato.
In case you did not know the potato is native to South America. It is the nutritional base of millions and a culinary delight for major parts of the globe.
There are about 24 different varieties of potatoes, the most widely used are the Yukon gold potato.
It contains a lot of starch, vitamins, fiber needed to the daily diet. Is used in a variety of forms including alcoholic beverages.
I recommend not keep in the refrigerator, it keeps well at room temperature, but just remember to consume it as soon as possible. Share with us this week full of recipes dedicated to this versatile vegetable and explore new ways to include it more often in the diet of your family.

INGREDIENTS

  • 2 pounds of baby gold potatoes
  • 1 cup of cilantro finely chopped
  • 1 garlic clove, finely chopped
  • 1 stick of butter
  • salt and pepper to taste

DIRECTIONS

Place unpeeled potatoes in a bowl cover with enough water and cook in microwave for 25 minutes. When ready, drain the colander to remove water, place back into the bowl and cool completely. When the potatoes are cold peel carefully.

In a saucepan melt the butter add the potatoes and stir constantly until golden brown about 5 minutes. Remove from heat, add the garlic, cilantro, salt and pepper.

Serve as an accompaniment to any meat.
Yield 6 servings.

Preparation time: 15 minutes
Cooking time: 30 minutes
Level of the recipe: Easy

Versión en español CLICK AQUI

Iniciamos esta semana con recetas dedicadas a la Papa.
Por si no lo sabia la papa es un tubérculo originario de America del Sur.
Es la base alimentaria de millones de personas y una delicia culinaria para grandes partes del globo.
Existen alrededor de 24 diferentes variedades de papas, las que mas gustan son las papas amarillas. Contiene una gran cantidad de almidón, vitaminas, fibra necesarios para la alimentación diaria.
Es utilizada en una gran variedad de formas incluyendo bebidas alcohólicas.
Le recomiendo no guardarla en la refrigeradora, se mantiene bien a temperatura ambiente, pero de igual forma recuerde consumirla lo antes posible.
Comparta con nosotros esta semana llena de recetas dedicadas a este versátil tubérculo y explore nuevas formas usted también de incluirla mas seguido en la alimentación de su familia.

INGREDIENTES

2 kilos de mini papitas
1 taza de cilantro picado fino
1 dientes de ajo picado fino
1 barra de mantequilla sin sal
sal y pimienta al gusto

PREPARACION

Coloque las papas sin pelar en un tazón cubra con suficiente agua y cocine en el microondas por 25 minutos.
Una vez listas, pase por el colador para eliminar el agua, coloque de nuevo en el tazon y enfrie completamente. Una vez frias retire la cascara con cuidado.

En una olla derrita la mantequilla agregue las papas y mueva constantemente hasta que tomen un color dorado aproximadamente 5 minutos.
Retire del fuego, agregue el ajo, el cilantro, sal y pimienta.

Sirva como acompañamiento para cualquier carne.
Rinde 6 porciones

Tiempo de preparación: 15 minutos
Tiempo de cocción: 30 minutos
Nivel de la receta: Facil

ENGLISH VERSION CLICK HERE